Introduction
PIP, a package management system, facilitates the installation and administration of software packages developed in Python. Abbreviated from “Preferred Installer Program” or “Pip Installs Packages,” this utility efficiently handles PyPI package installations via the command line interface.
Installing PIP on Windows is a straightforward process. It involves downloading the installation package, accessing the command line, and initiating the installer.
This guide illustrates two methods for installing PIP on Windows. Additionally, it provides instructions for verifying, updating, and customizing PIP settings.
Prerequisites
- Access to Command Prompt.
- Python installed and added to PATH.
Checking if You Have PIP Installed on Windows
PIP comes pre-installed with Python 3.4.x and above. Nevertheless, depending on the method of Python installation, PIP might not be readily available on the system. Prior to installing PIP on a Windows system, it’s advisable to verify its existence:
- Open the command prompt window by pressing the Windows Key + X and selecting Run.
- Enter cmd.exe and press Enter.
Alternatively, you can type cmd in the Windows search bar and select the “Command Prompt” icon.
- Input the following command in the command prompt:
pip help
If PIP returns an error message indicating that the command isn’t recognized, you can proceed with one of the following methods to install it.
Method 1: Installing PIP on Windows Using get-pip.py
This method involves utilizing cURL to download the installation file and carrying out additional configuration steps after installation. Here’s a step-by-step guide to installing PIP using this method:
Step 1: Download get-pip.py
Before proceeding with the PIP installation, ensure you have the get-pip.py file downloaded. Execute the following cURL command in the command prompt:
curl https://bootstrap.pypa.io/get-pip.py -o get-pip.py
Wait for the download to complete before proceeding to the next step.
Step 2: Installing PIP on Windows
To install PIP, run the following Python command:
python get-pip.py
Note the location from the output warning, which will be required to add PIP to the Path environment variable.
Step 3: Verify Installation
To test whether the installation was successful, type the following command:
python -m pip help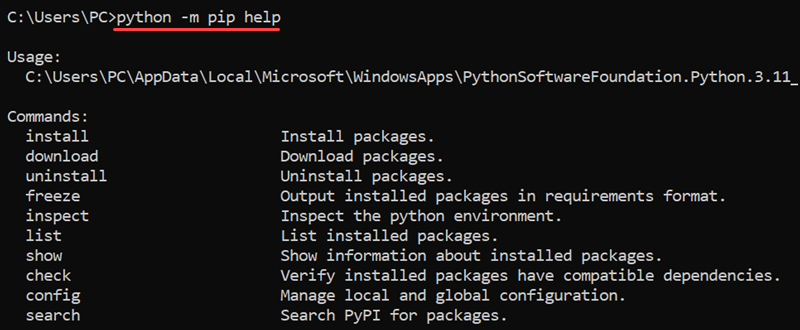
If PIP is installed, the program runs without any errors. The output shows the software’s location and a list of pip commands.
Repeat the installation process or use the second method if you receive an error.
Step 4: Add Pip to Path
“To enable PIP to run from any directory and function as a standalone command, incorporate it into the Windows environment variables. This action effectively eliminates the ‘not on Path’ error.
To integrate PIP into the Path, adhere to these instructions:
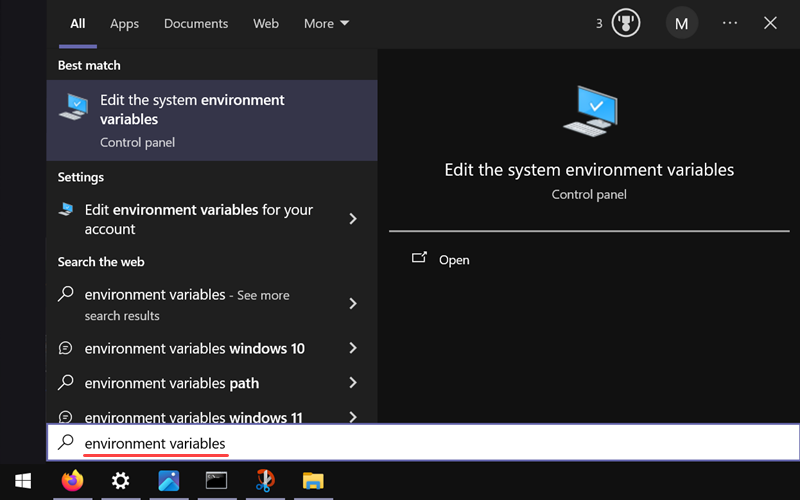
- Navigate to the Start menu, look up ‘Environment Variables,’ and hit Enter.”
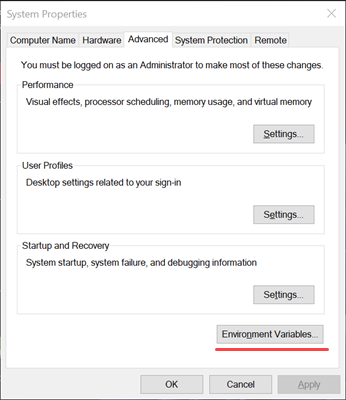
2. Click the Environment Variables button.
3. Double-click the Path variable to edit it.
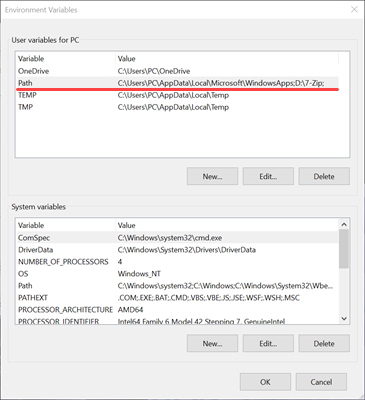
4. Select New and add the directory where PIP is installed.
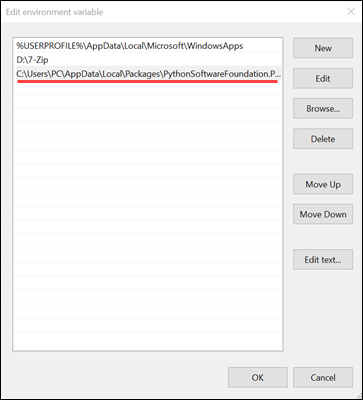
5. Click OK to save the changes.
6. Open a new command prompt session and run the following command to test the changes:
pip help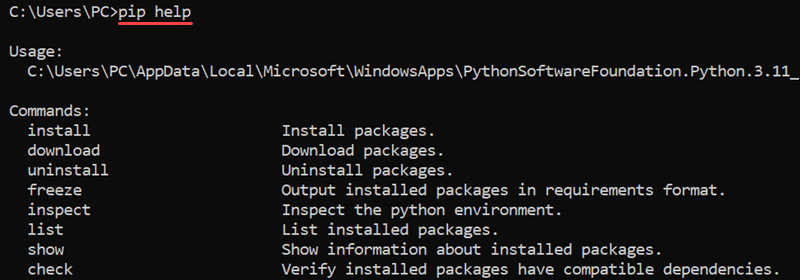
If the command isn’t functioning, consider employing pip3 instead of pip. Another option is to include the directory where Python is installed in Path and then retry the process.
Step 5: Configuration
You can locate the PIP configuration file in various spots within Windows. To check the current configuration and display all potential file locations, utilize the following command:
pip config -v list
The command reveals potential locations where the pip.ini configuration file could exist globally, for a user, or for a specific site. Following these locations, you’ll find the current configuration settings, if they’ve been set.
Method 2: Install PIP on Windows Using ensurepip
The alternative approach employs Python for PIP installation sans the need for downloading or executing any scripts. Input the subsequent command into the command prompt:
python -m ensurepip --upgrade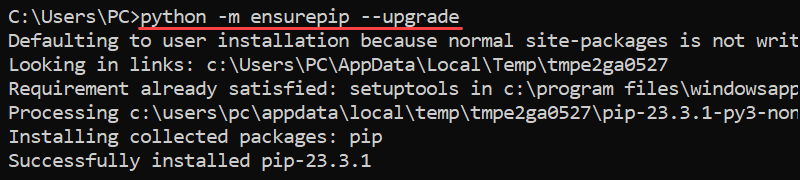
Wait for the installation to complete. Check that PIP is installed correctly with the following command:
pip --version
The command outputs the PIP version to the console.
Note: If the command is not found, add Python to the Path environment variable. Or, try using the command as pip3 instead of pip.
Upgrading PIP for Python on Windows
Occasionally, fresh iterations of PIP are rolled out. These updates might enhance functionality or serve as essential security measures.
To update PIP on Windows, simply input the following command into the command prompt:
pip install --upgrade pipThis command uninstalls the previous version and then installs the most current version of PIP.
Downgrading PIP Version
If a newer version of PIP isn’t working well, you might need to downgrade. To do so, just specify the version you prefer.
Here’s how to downgrade PIP:
python -m pip install pip==[version_number]For example, to downgrade to version 18.1, run:
python -m pip install pip==18.1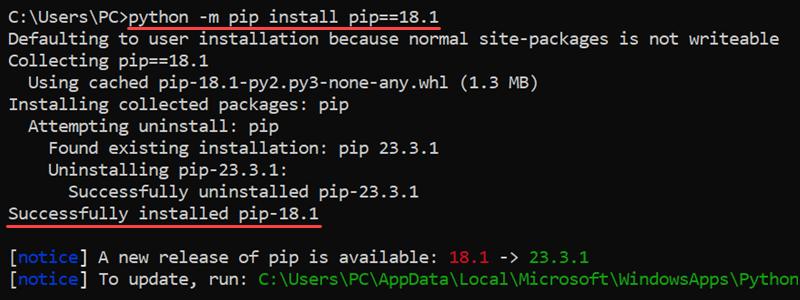
You should now see the version of PIP that you specified.
Conclusion
After reading this guide, you’ve installed PIP and can manage your Python packages on Windows.

